Deleted
Deleted Member
Posts: 0
|
Post by Deleted on Oct 12, 2017 10:17:24 GMT
The last component to be sorted for the cable steering was the transom mounted cable swivel.  The off the shelf Multiflex bracket whilst being somewhere near correct for the tiller arm centreline from the transom to the cable pivot it was too short to reach the nice thick stringer running across the transom. A bit of 50 x 6 stainless flat made up the 6mm shortfall on the tiller arm to transom centreline and now means that the cable can be accurately placed to connect to the tiller arm. Apart from fitting these bits nothing much more can be done until she is out the water in November. |
|
|
|
Post by larkboy on Oct 13, 2017 19:25:15 GMT
Nice work Gazza, wish I had someone like you to do stuff like that for our boat, instead of me having to do it...😉
|
|
|
|
Post by JohnV on Oct 14, 2017 9:20:15 GMT
Nice work Gazza, wish I had someone like you to do stuff like that for our boat, instead of me having to do it...😉 Yeah ...... I'd go along with that as well  |
|
Deleted
Deleted Member
Posts: 0
|
Post by Deleted on Oct 14, 2017 15:59:36 GMT
I had the foresight to draw up the helm brackets and swivel bracket mounting plates along with a parts list. All scanned and saved onto my personal file on the works'pooter. Just incase another Ormelite owner decides to fit rotary cable steering....  |
|
Deleted
Deleted Member
Posts: 0
|
Post by Deleted on Oct 14, 2017 16:32:01 GMT
It's looking highly probable that this is getting some attention in the blacksmith's shop. 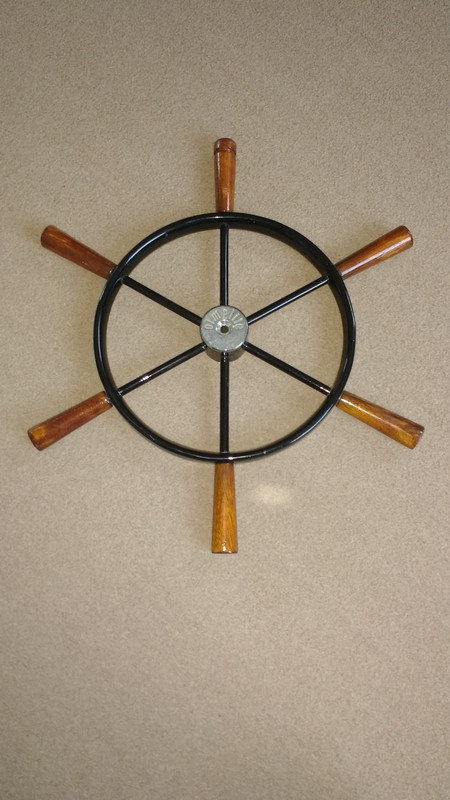 Much to my surprise my mate isn't all that keen on the off the shelf stuff available with a 3/4" taper at Oundle Marina. He's going to scour eBay but I have a sneaking suspicion he won't find anything suitable on there either. Bit more work for me, but fingers crossed I do end up mating the original wheel to the new helm unit 🚢⚓🍻👍 |
|
|
|
Post by JohnV on Oct 14, 2017 16:57:50 GMT
Good !!! the original wheels are lovely things !!!
|
|
|
|
Post by patty on Oct 14, 2017 18:13:10 GMT
It all looks rather lovely to me..sigh..it's a world I can only view from outside in but I'm very impressed by the skill shown by tb ers
|
|
Deleted
Deleted Member
Posts: 0
|
Post by Deleted on Oct 14, 2017 18:17:29 GMT
Good !!! the original wheels are lovely things !!! This text is very promising 🍻⚓🚢👍 1,168 steering wheels scrolled through and exactly 0 I like lol 😂 |
|
Deleted
Deleted Member
Posts: 0
|
Post by Deleted on Oct 14, 2017 18:28:12 GMT
It all looks rather lovely to me..sigh..it's a world I can only view from outside in but I'm very impressed by the skill shown by tb ers Being mechanically minded is a curse and a blessing in equal measure, the satisfaction of making something yourself along with saving a boat load of money can soon be eroded by some chancing git only too willing to take the piss out of your talents and good nature solely to save themselves a couple of quid  grrr etc! I have learnt a little one syllable two letter word for those not worthy of being on the list of people I like to help. Took a very long time to figure it out though. The dwarf accelerated my learning curve on that front though! |
|
Deleted
Deleted Member
Posts: 0
|
Post by Deleted on Oct 14, 2017 19:26:54 GMT
Nice work Gazza, wish I had someone like you to do stuff like that for our boat, instead of me having to do it...😉 When/if I get a boat the first thing on my list of things to do is to get Stabby to kidnap Gazza - he will only be missing for 6 months so I'm sure the Dwarf will not miss him. |
|
|
|
Post by larkboy on Nov 5, 2017 17:20:15 GMT
|
|
Deleted
Deleted Member
Posts: 0
|
Post by Deleted on Nov 5, 2017 17:54:01 GMT
Bastard lazy tongs! Excellent at pinching skin as well as driving rivets home Looks a better job than the plastic Ketter efforts 👍🍻 |
|
Deleted
Deleted Member
Posts: 0
|
Post by Deleted on Nov 7, 2017 13:31:03 GMT
Northern Star's steering wheel is all but done. I'll try and get to a computer and put pictures up later. www.postimages.org is not playing ball on the mobile, server responded with a 0 code??!! |
|
Deleted
Deleted Member
Posts: 0
|
Post by Deleted on Nov 7, 2017 14:16:03 GMT
Heres how it was done:- I used the Bridgeport to save taking the gap out of the lathe as the wheel was too big to swing. Take one mega useful fixture that I've had for donkeys ages.  It gives three points of contact in the vice on a round bar. 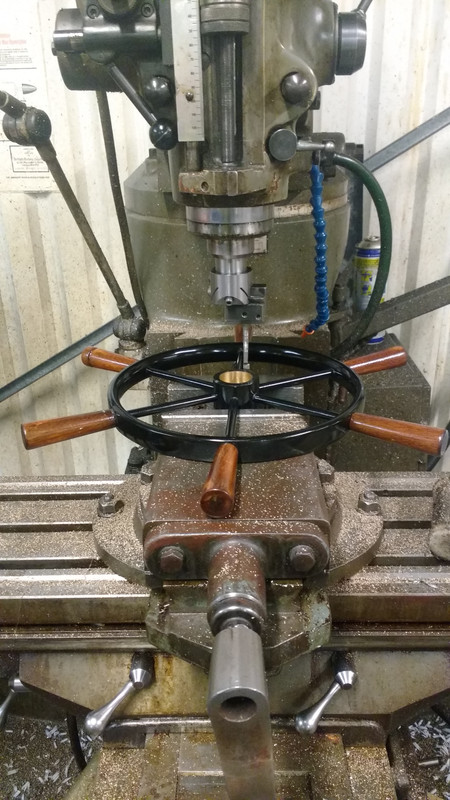 Stick an elderly Jones and Shipman boring head in the milling machine and go to work! You end up with this. 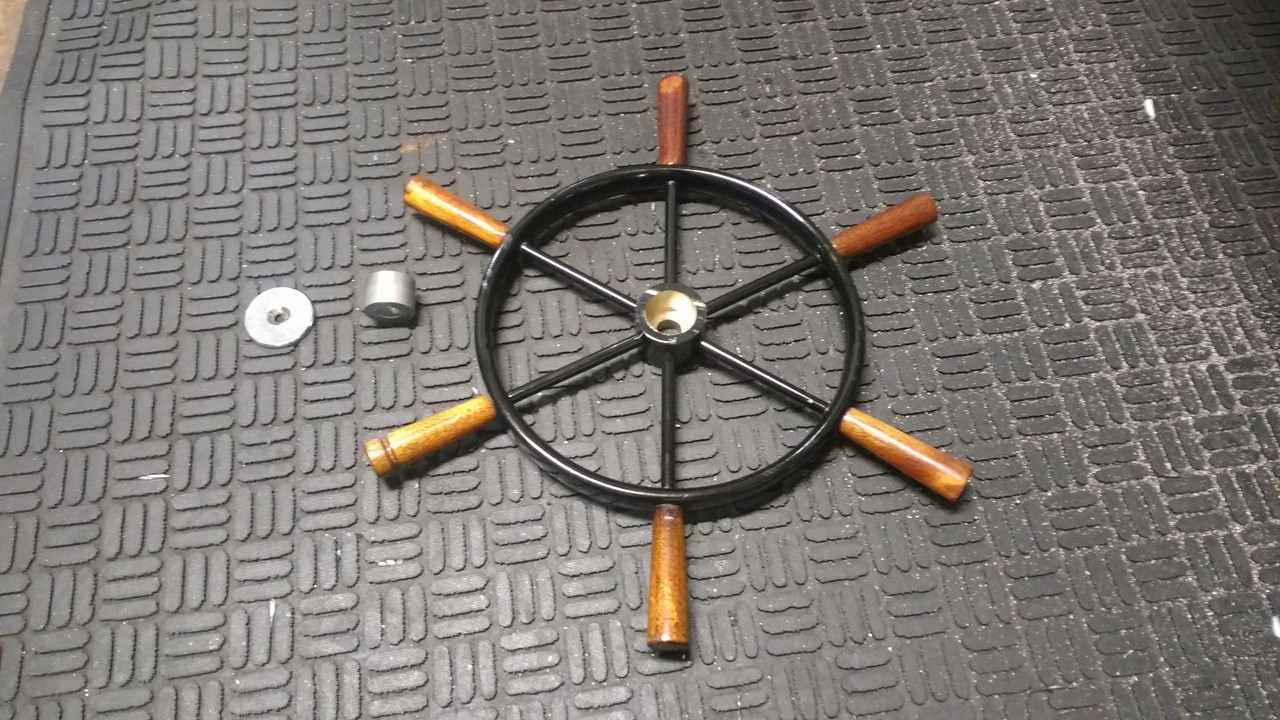 The aluminium insert is an off the shelf 3/4" taper adapter from asap, it needed the OD skimming parallel - this was the dimension that decided how much needed boring form the wheel hub. it was £13 odd pounds and way cheaper than my time in the lathe making one from scratch - time being the most valuable commodity I don't have at the moment! Insert fitted. 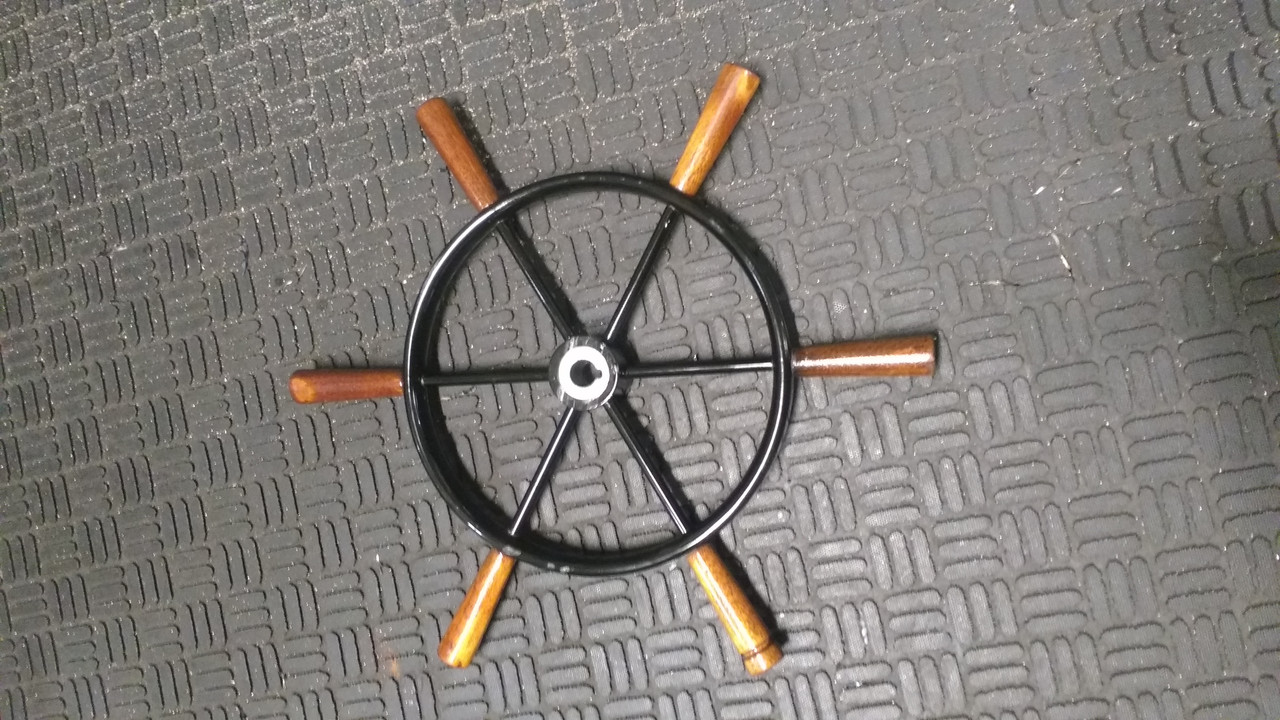 And the finished article 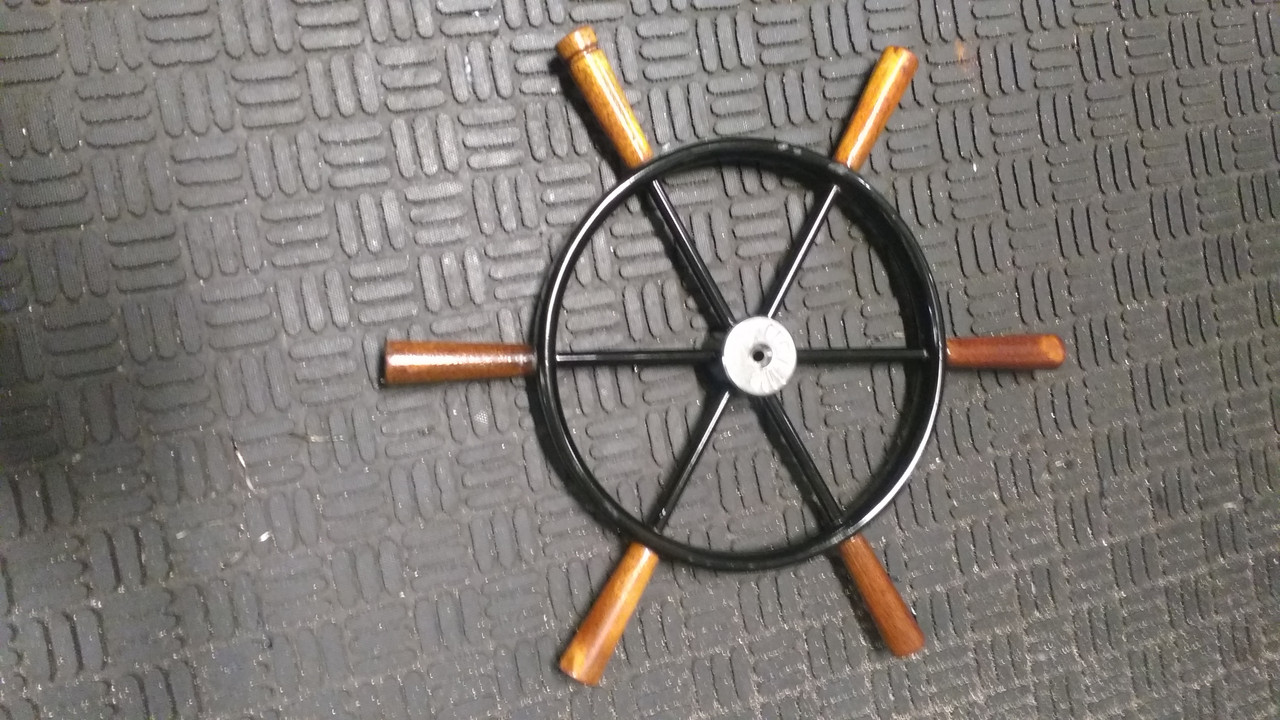 All that remains is to drill and tap the wheel hub for some grub screws to lock it all together, ft the lot to the new helm then dimple the 3/4" taper insert in the dead ahead position, this will be done when the new rudder is fitted and the cable and helm full installed. I can't say I will be sorry to see the back of the nightmare that was trying to adjust the two cables to get the king spoke dead ahead - John knows what a pig of a job that is! |
|
Deleted
Deleted Member
Posts: 0
|
Post by Deleted on Nov 9, 2017 15:20:23 GMT
I thought I'd put some pictures up of the cheap and neat solution Orme and Son had of how to avoid buying a ludicrously expensive rotary helm unit.  This Stub shaft flange was coach screwed to a piece of 3/4" thick ply. The end the wheel fits to was chopped off by me and turned down to 12mm to fit an a collett in the Bridgeport to make life easier clocking the wheel up for boring. A piece of chain lays over the sprocket and is connected either end to the wire ropes that went off to the rudder stock quadrant - tensioned via rigging screws, this is why its such a bugger to get the King Spoke dead ahead. The asssembly consits of a 1" brass bar turned and keyed to 3/4" for the wheel. The brass washer and 5/16" bolt is to stop the bar pulling through the 1" tube it rotates in.  This sits inside a bored 1" tube with a BSP thread screwed into a 1" BSP flange - they thoughtfully provided a grease nipple too! 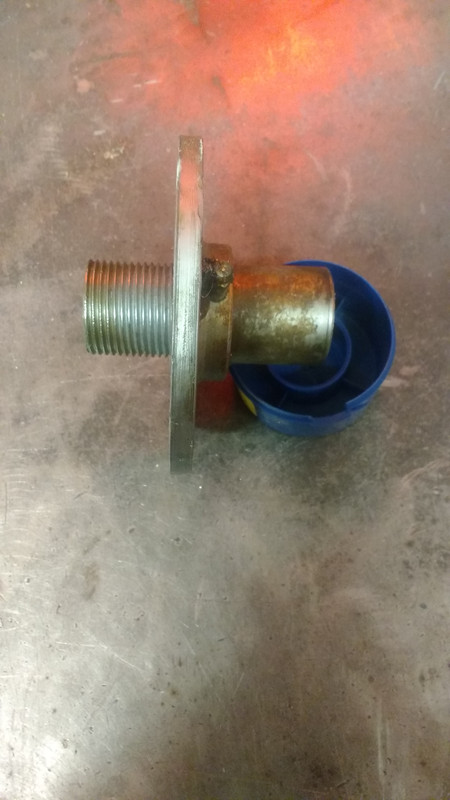 And here is how it looks sort of thrown together. 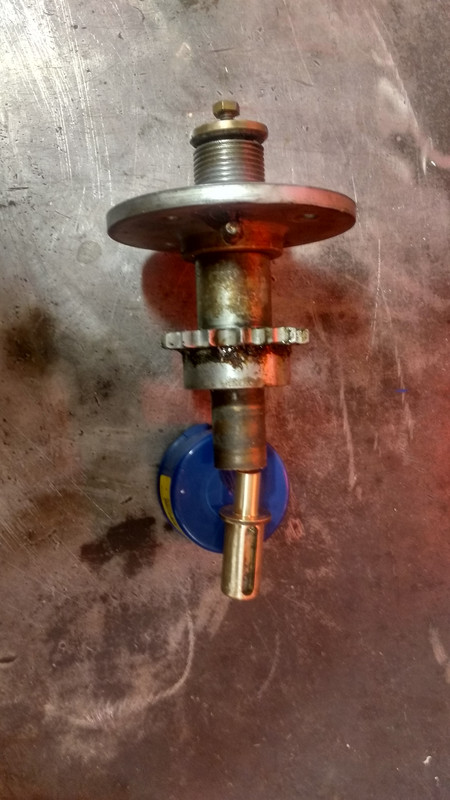 The problem with Northern Star's slowly seizing steering was no amount of tension could stop the chain jumping the sprocket. Along with the King Spoke problem, my mate wanted to do away with the cables, having had one snap previously. If a rotary cable goes they are fairly easy to change, a wire rope system needs lots of patience and the flexibility of a contortionist to get at the pulleys and tensioners when a cable goes. |
|


 grrr etc!